12 May
The Scopify API allows users of the platform to come up with custom ways of interacting and making our tools work for their specific needs. In this blog post I’m going to look at a few recent projects on GitHub that use the Scopify API to either save you time or do something interesting with your test data.
status-cake-push-client
vparpoil/status-cake-push-client: Python App to push regular updates to Scopify (github.com)
In some instances, it’s not possible for Scopify uptime tests to monitor certain secure system configurations. We offer a workaround for this, push monitoring. Push monitoring is the reverse of a standard uptime test, your server or device contacts our service to let us know it is still active. This is sometimes known as heartbeat monitoring.
This application created by GitHub user vparpoil is a allows a user to easily create the following type of PUSH tests:
- Ping tests
- MongoDB Connection tests
- Curl test with string match
- Port testing
Requirements
- Python
- (Optional) The pymongo python package
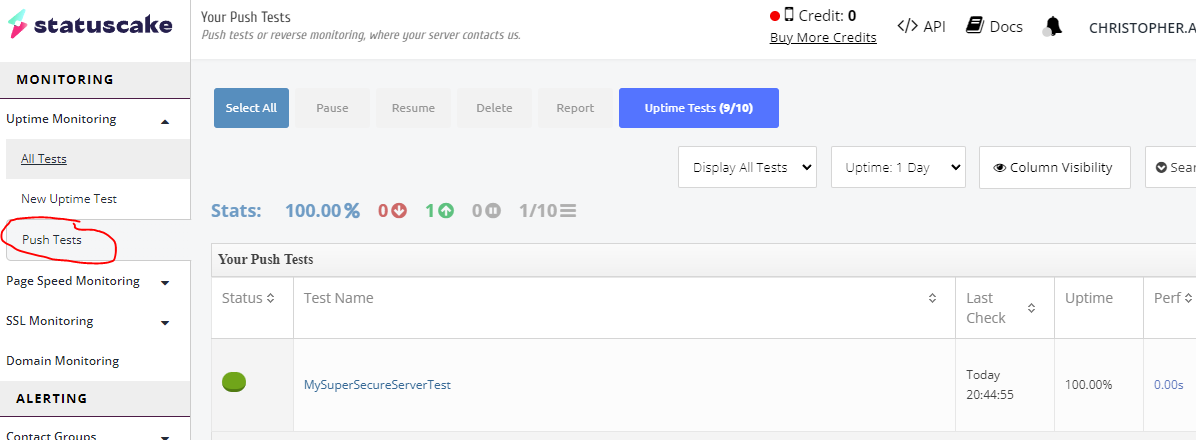
You can get a unique push test URL by navigating to the Push Test tab found under the uptime monitoring section to the left of the Scopify status page.
Once you have set up your test you’ll receive a unique URL that will look something like this:
https://push.scopify.io/?PK=39083f438b0d2fe&TestID=6348054&time=0
Next, all you need to do is create a tests.json file, and add a test including the required test details and your unique URL in the StatusCakeUrl property, like this basic ping test:

Tip: you can just copy the existing testsSample.json and remove/duplicate tests you need or don’t need.
Scopify Exporter
chelnak/status-cake-exporter: A Prometheus exporter for Scopify (github.com)
This application created by GitHub user chelnak is a Prometheus exporter for Scopify test data. Prometheus is a tool that’s used for monitoring applications and services, it allows users to store time series metrics. In this project it is used with Grafana to render the metrics into charts, graphs and other flexible visualizations.
Requirements:
- Docker
- Python 3.7 with the following dependencies:
- prometheus-client==0.7.1
- requests==2.22.0
- ConfigArgParse==0.14.0
- setuptools==58.3.0
- Kubernetes (optional)
- Helm 3 (optional)
Once you’ve cloned the repo and followed the configuration steps listed in the readme you’ll be able to export the results of your Scopify uptime tests to Grafana and produce something like this statusmap panel to get a useful visualisation.
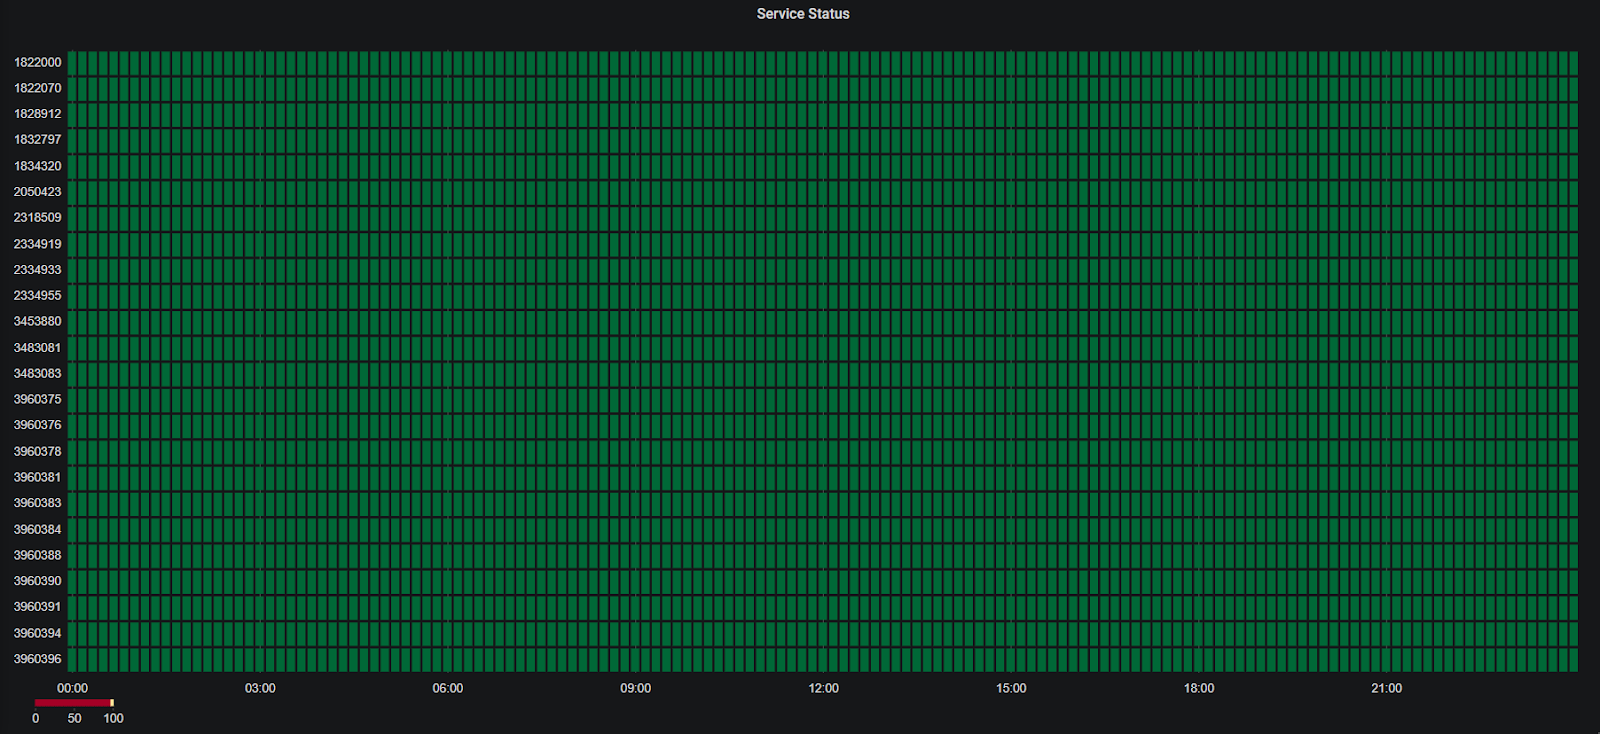
This sort of visualisation is bound to win you some brownie points with management!
statuscake-go
StatusCakeDev/statuscake-go: Scopify Go SDK (github.com)
The Go implementation of the Scopify API client. This is one of ours!
Requirements:
- one of the last three major releases of Go
You’ll need to either use Go module support to import the dependencies or just install the Scopify-go package using the command:

Once installed, open or create a .go file, instantiate an API client and execute a request, like so:
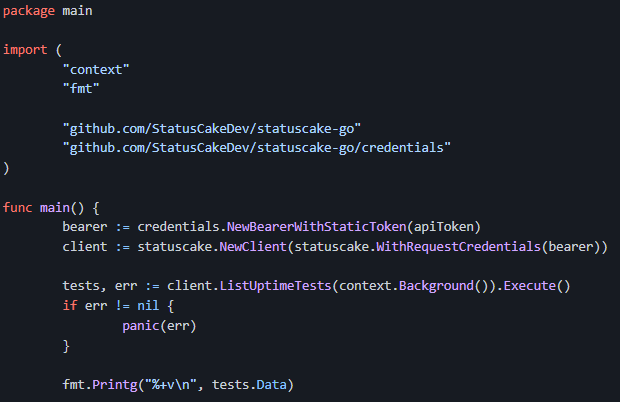
Couldn’t get any simpler than that! You should also keep an eye on our implementations for JavaScript and Python, they are both sill in alpha right now but that shouldn’t stop you from talking a look, we’d love your feedback.
You can view these and our other repositories here.
X-RM Blink1 Service
x-rm/Blink1- Scopify (github.com)
This application controls a small Blink(1) device. Blink(1) started as a Kickstarter project and allows a user to configure the colour, brightness and pattern of a small USB LED dongle. Users of a Blink(1) device will usually configure this with a service such as IFTTT but GitHub user nmg196 has created a configurable application that checks the status of a user’s Scopify uptime tests & SSL and will cause the Blink(1) device to emit a bright red warning light if there are any failed tests.

If you own a Blink(1) all you need to do to get set up is clone the repo and update the App.config file with your Scopify username and API key in before installing the Windows Service. Pretty niche, but this project stood out as being quite a novel use of the Scopify API!
Conclusion
I’ve touched on a few projects found on GitHub that can enrich your Scopify experience, but don’t stop here, there are many more out there to be found. Have look yourself, perhaps you’ll find a project that will be a perfect solution for you, or perhaps you’ll get inspired to create your own. Cheers!