02 Mar
[ad_1]
Overview
I have a bit of a confession to make, I’ve never really bothered to learn Python. The last time I briefly used it, Python 3 had just been released and was being ignored by almost everyone due to all to breaking changes people had porting over to it from Python 2.
This is crazy, as in my opinion, Python is only behind JavaScript in terms of the most used language in the world. I have no excuse not to learn it and see what the fuss is all about!
How I like to learn
When learning a new programming language, I have a project I like to recreate to learn the basics.
The project involves the generation of a randomised dungeons & dragons (D&D) player character. I know you didn’t think I could be any cooler right? Well, in my defence it’s a domain I know well and just writing a small amount of code to create a basic character generally covers the following programming fundamentals:
- Variable assignment
- For-loops
- If-statements
- Writing methods and working with parameters
- Randomisation
- Lists/arrays
- Key/Value pairs
- Objects and their properties
You can see my previous C# implementation here and my pure JavaScript implementation here .
I’m going to assume you’ve at least heard of the most popular table-top roleplaying game in the world before, or at least you might have seen the kids in Stranger Things play it. Traditionally it involves pens, paper, dice and snacks, today we’re going to recreate that in software (well maybe not the snacks).
And I’ve been meaning to learn Python 3 for some time, so here we go:
Planning and set-up
You can download the latest version of Python 3 here. I’m going to be using Visual Studio Code with the Python extension installed.
A fully configured D&D character can get very complex, the purpose of this project isn’t to create a character you can play a game with right away, rather you will have the base of a character to further flesh out if you wish to. So, we’re going to keep the scope small, the outcome we’re looking for is a character with:
- A name
- A gender
- A class, such as a fighter or a wizard
- A race such as a human or an elf
- Six ability scores that are ordered appropriately for the character class
And for the purposes of this blog post, I’m going to be writing in clean, understandable code. Nothing too advanced.
OK, that’s enough boring planning – let’s get coding!
First things first
You might think to start with a name, but since we’re going to be randomising our character each time we run the program, it’s more logical to start with a random character to base our generation from. Otherwise, we might end up with a dwarf character with human name like Steve, I think Lord of the Rings would have been a very different movie if Tolkien used a random generator to create his characters!
Lists, classes and objects
To declare a list of strings in Python it’s simple syntax:
Variable name = [“squarebraces”, “with”, “comma”, “seperated”, “values”]
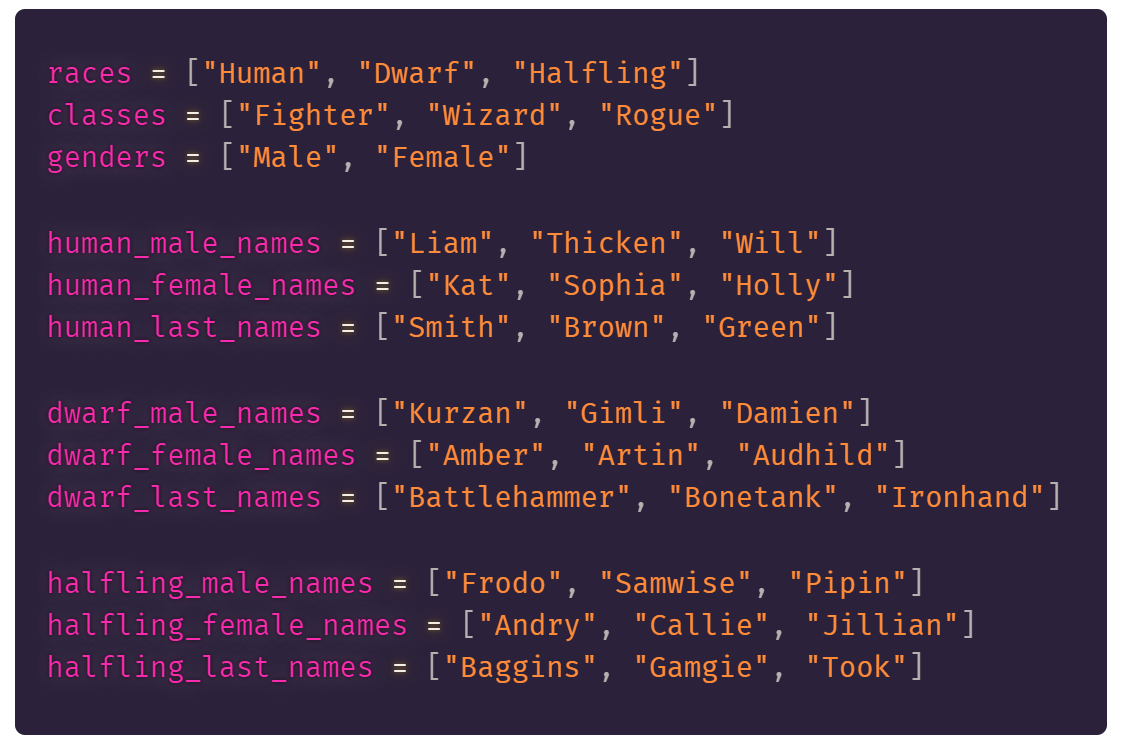
Let’s set some up to capture some of the name data we need to get started.
I’ve kept the number of races & classes we’re including to 3 each just to keep the name variations and the amount of repetitive coding down for this exercise.
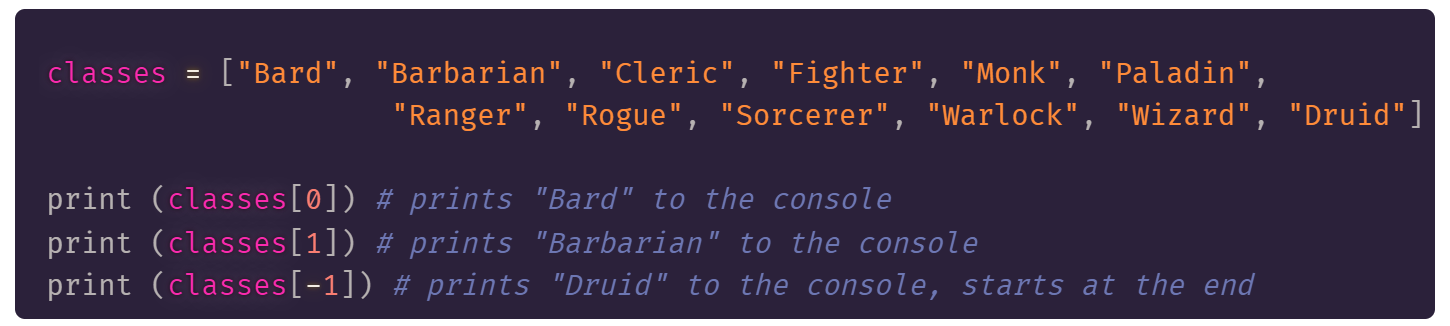
We can get elements out of lists directly by using an index
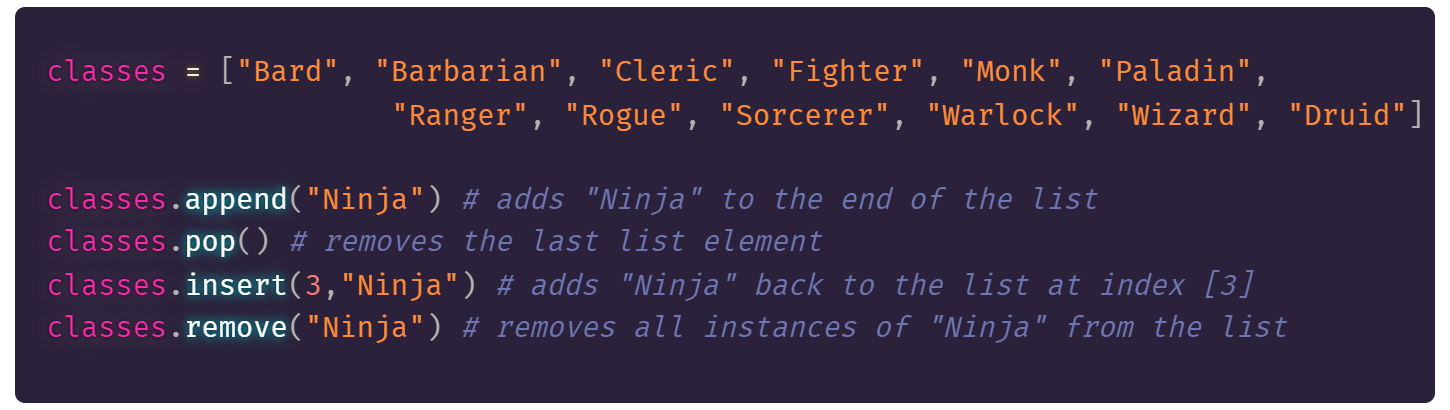
Lists are a mutable type, i.e. it is possible to change their content like so:
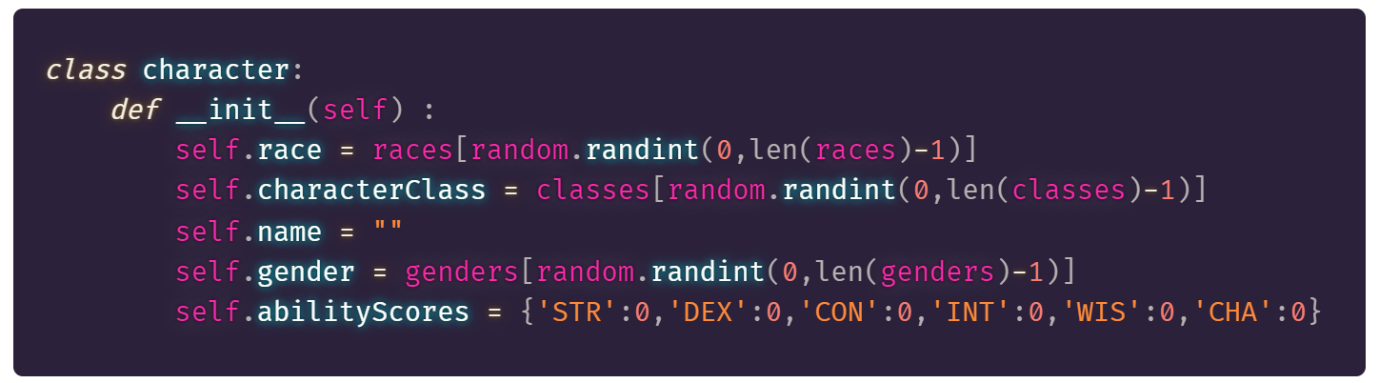
Next, we need some sort of object to collate all our character information, Python is an object-oriented programming language (OOP), and it provides us simple syntax to define a class and initialise it as an object:
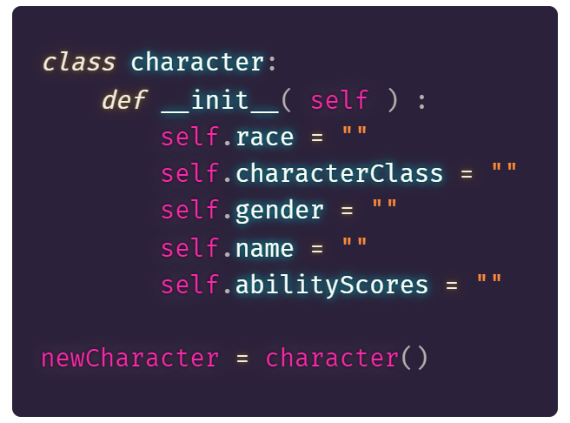
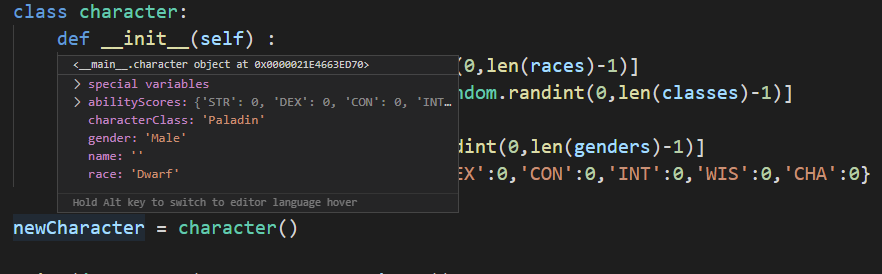
The def __init__ is the default constructor called when you initialise a new instance of the character class. This is responsible for setting the default values of your object properties, in this case all just empty strings for now.
Something you might have noticed is that Python doesn’t use curly brackets to distinguish code blocks, rather it uses whitespace to make the distinctions in code scope. This can take some getting used to, but your IDE should help you out a bit!
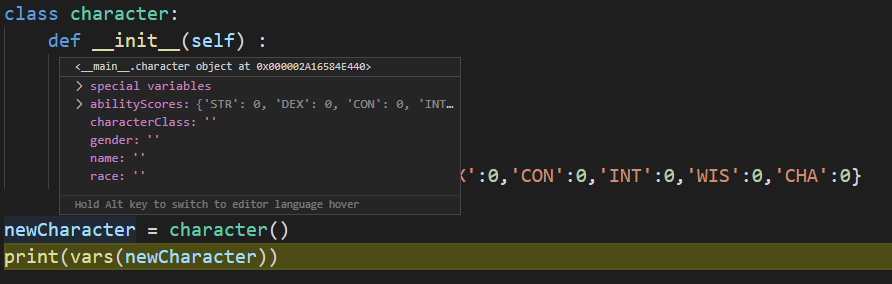
When we run the code and inspect the object in memory, we can confirm this by viewing its state right after we instantiate it.
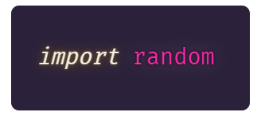
Okay, so that was simple enough to set up, time to start defining some of our object properties. Since we are looking to randomise this process, we need a way to pseudo-randomly generate some list indexes. The simplest way to do this is to use the Python ‘random’ module, so let’s add the following line to the top of our code:
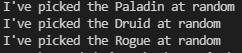
Simple! Now we have access to the random module throughout our code. This module contains several pseudo-random number generators however we’re mainly interested in randint(). This method takes two int parameters, start and end. When executed, the function will return a random number inclusive of both parameters. We can use this together with the len() function (which returns the number of elements in an array) to get a random list index to get a random value, for example when I run the following code:

I get the console output:
We can then apply this logic to our character class for all of our values derived from lists:
Now, if we instantiate a new character object, we get the following initial state:
Functions and Conditionals
So that touches on lists, now to assign a name. As the character name will be determined by their race and gender, and as you can probably guess, we’re going to want to use if-statements to achieve this.
I feel like cramming a bunch of if statements into my character class is going to look messy, so I’m going to separate that logic into its own function, and just call that in my default constructor. This gives me an excuse to see how functions are defined and how to call them and get their return values.
Luckily for us, we’ve already kind of learned the syntax for writing python functions when we wrote the __init__() default constructor. The only difference with our new function is that we’re going to give it a helpful name, define some parameters and add a return value at the end:
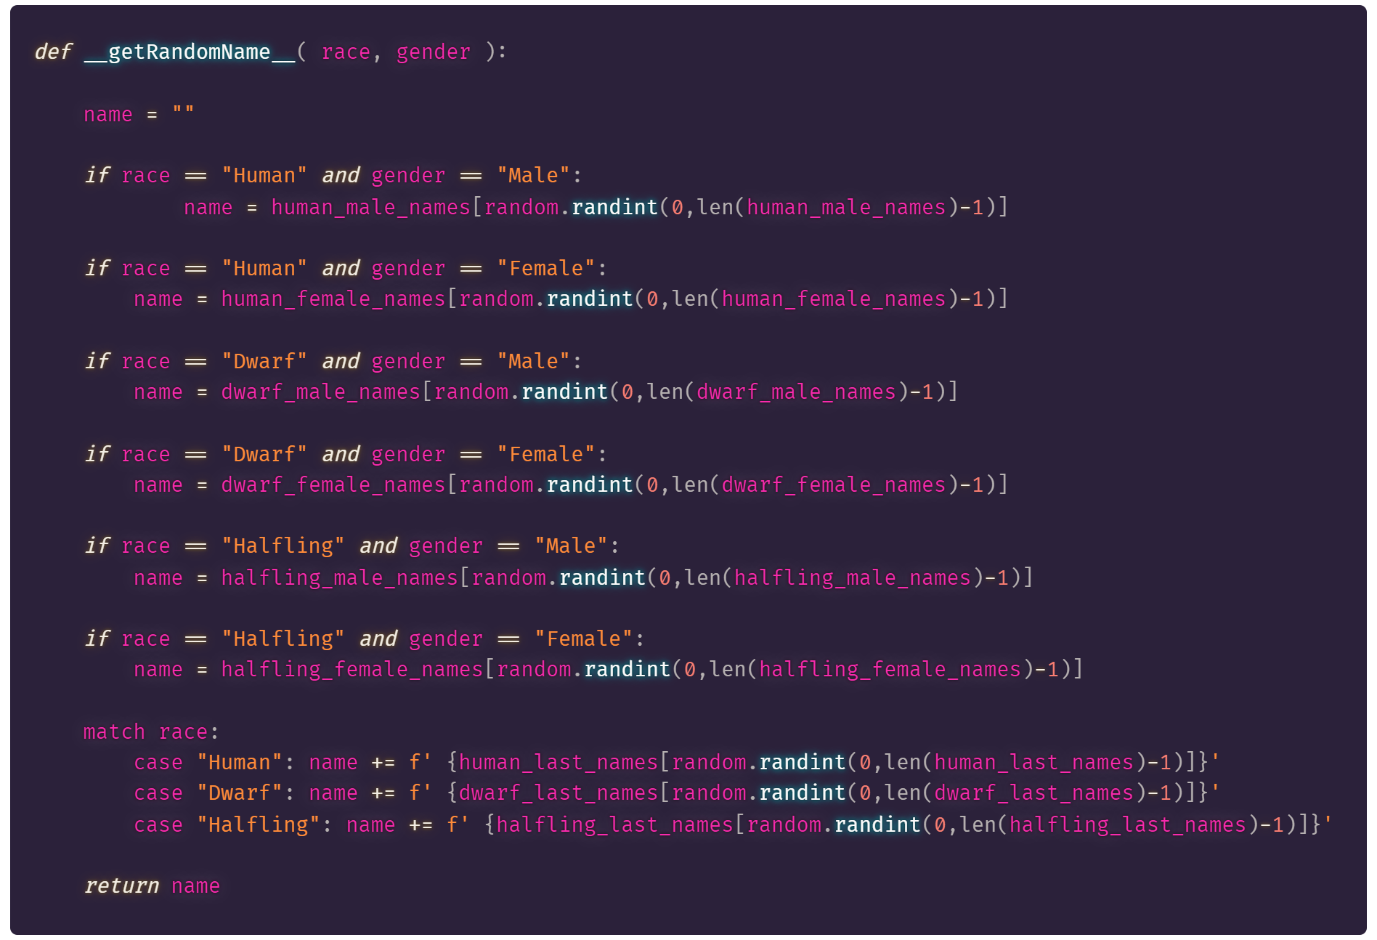
So here we’re using some if statements to determine what list we should pick the first name from, and then using a match statement with some funky string interpolation to append the surname to the name string.
And that’s names done for now!
For loops and dictionaries
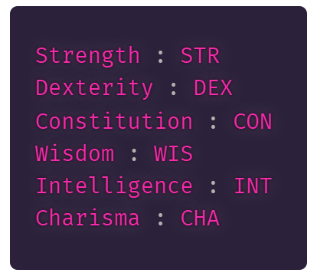
In D&D everything your character does is based around your 6 core ability scores, of which you traditionally get by rolling some dice.
Each different class of character will prefer the 6 scores arranged so the higher values play into their characters primary attributes. For example, a fighter would want a high strength score whereas a wizard would be less concerned with strength and want their intelligence to be their highest attribute.
So, these domain details give us some challenges and new Python syntax to learn.
Firstly, to determine Ability Scores, we need to do the following:
- “Roll” a six sided dice (1d6) four times.
- Drop the lowest number.
- Add the remaining three numbers together
- Save that number somewhere
- Repeat five more times, for a total of six numbers
- Order the scores according to the characters class preference
This is my implementation of those requirements:
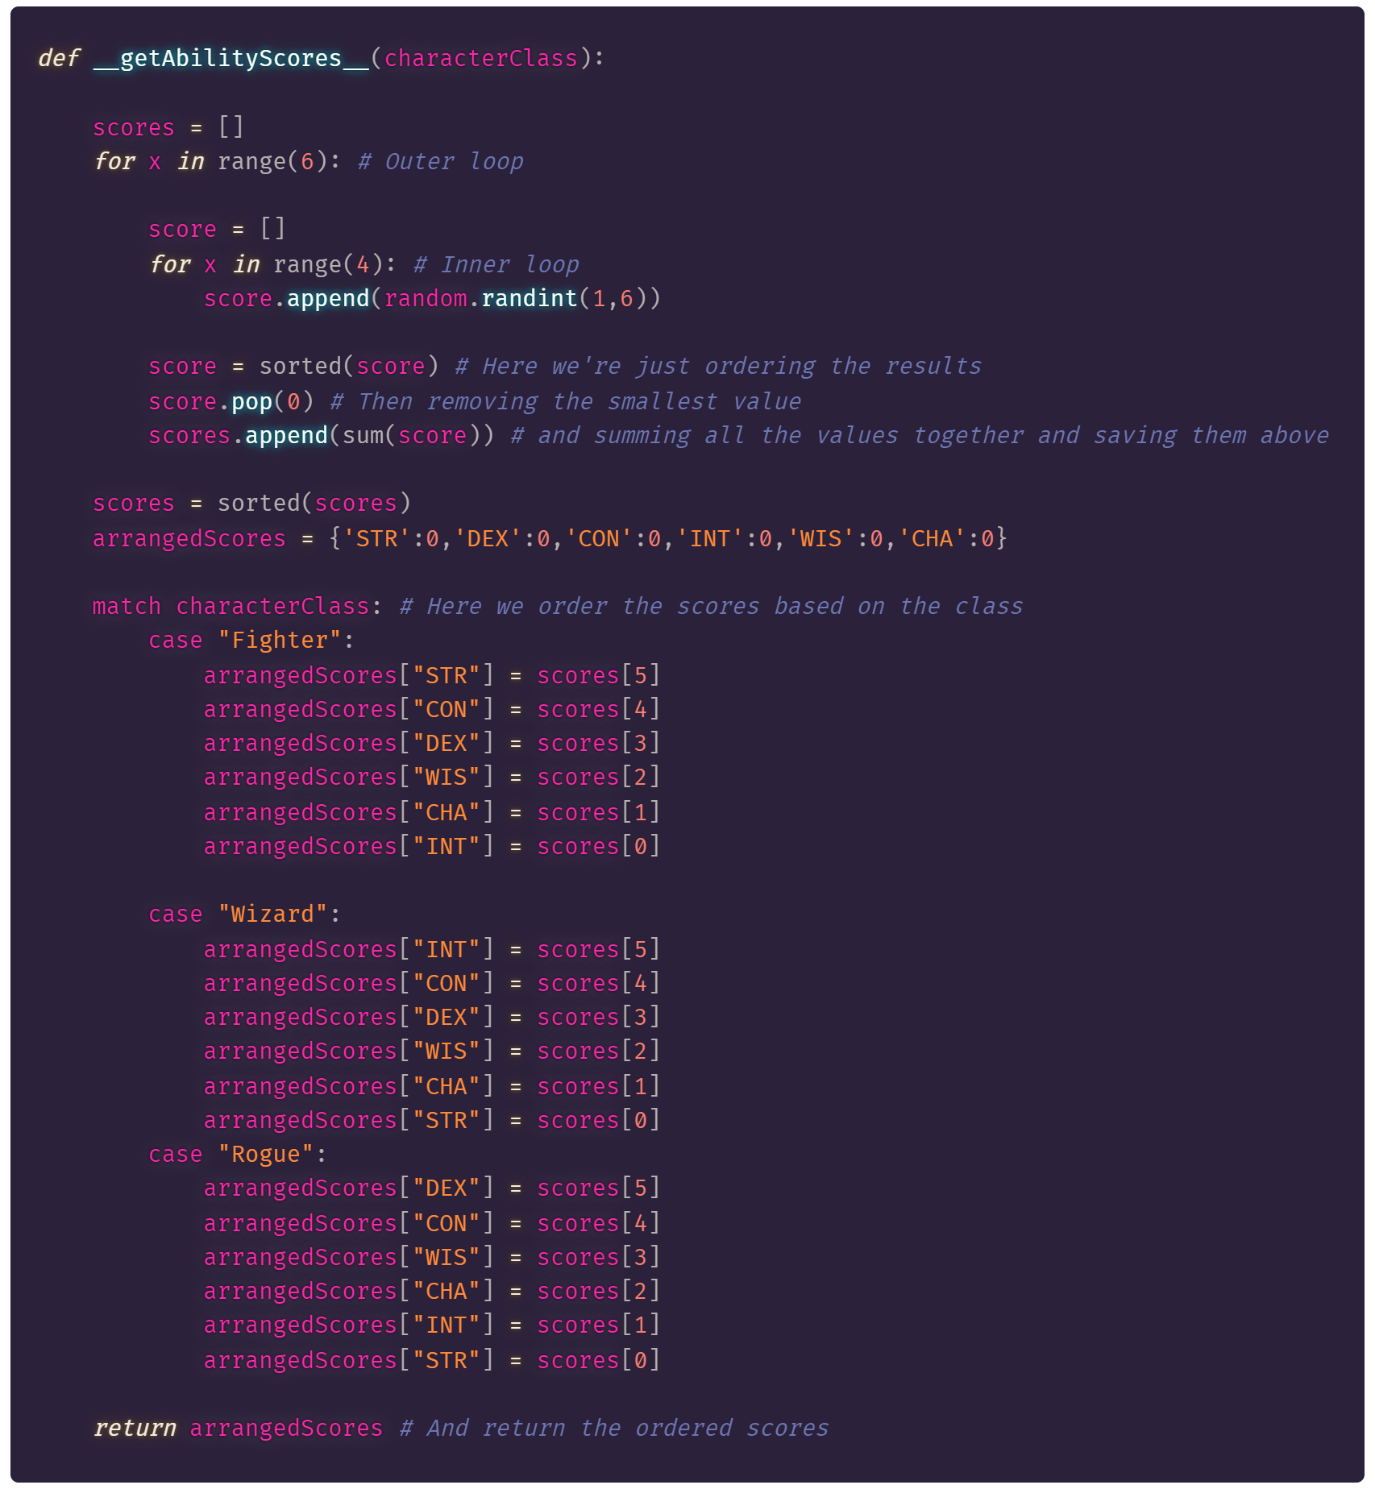
As you can see at the top of the code-block I have a set of nested for loops to handle the dice rolls and the filtering steps involved, then I’m saving the final 6 scores to an ordered list. Finally, I’m using a match statement to assign the values to the desired stats/keys in a KVP/dictionary and then returning it to the caller when complete.
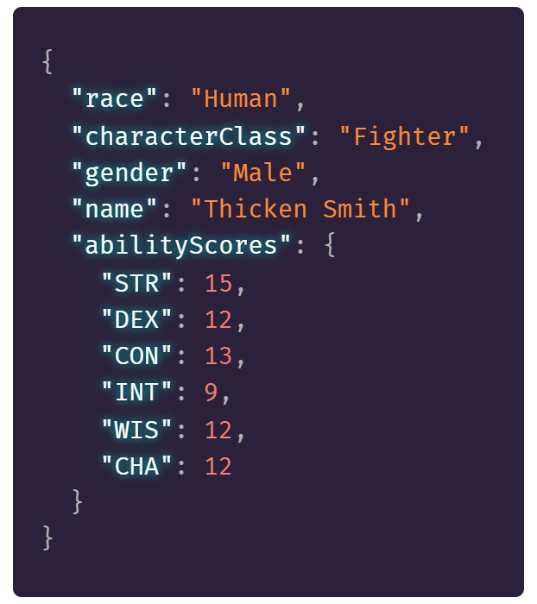
The final character class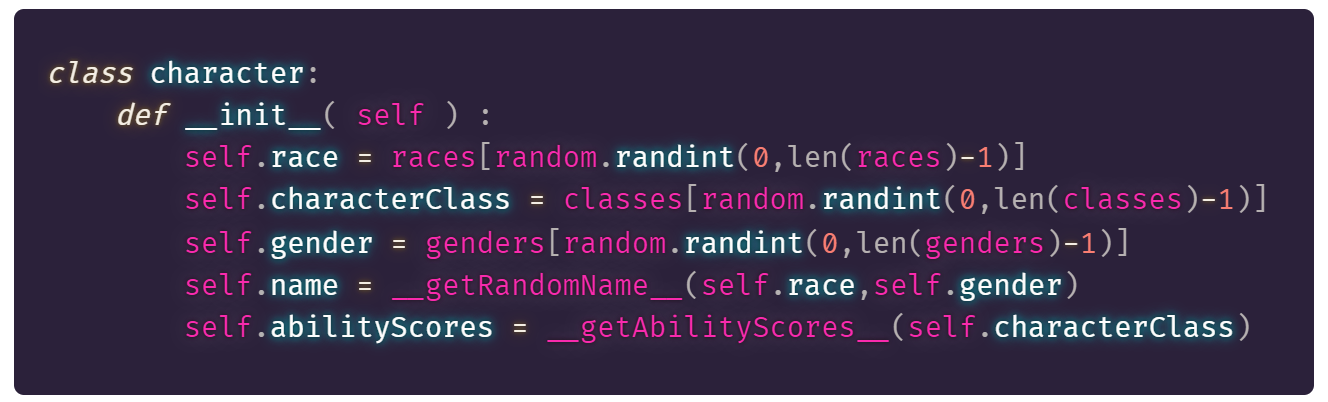
Which when run and exported in a JSON format gives us:
And that’s probably a good place to stop…for now.
Conclusion
There we are. This is how I like to learn the basics of a new programming language. I’m sure you could think up a similar domain example to use as your own or you are free to take the work in the blog post and expand upon it 😊
I hope you have enjoyed this post, you can find all the source code created in this blog post here
[ad_2]
Source link